Many people install solar panels but don't know how they are made. This creates confusion while choosing the right solar system. Understanding how solar panels are manufactured helps you make better decisions. It also helps you avoid low-quality panels in the market.
The solar panel manufacturing process is not simple. It involves chemistry, precision engineering, and strict quality checks. In this guide, you will learn the complete solar module manufacturing process — explained in simple, easy language.
If you are new to solar, first understand the basics of solar energy.
What Are Solar Panels Made Of?
Before understanding the process, you must know the materials. Solar panels are made of four main components:
- Silicon → Converts sunlight into electricity
- Glass → Protects the front surface
- Aluminium → Provides frame strength
- Backsheet (Plastic) → Protects the rear side
Other important materials include EVA (encapsulation layer), silver (electrical conductors), and copper wiring. These materials play a key role in the photovoltaic cell manufacturing process. Better materials mean better performance and longer life.
Different materials directly impact the efficiency and performance of panels. Learn how different technologies affect output in the solar technology guide.
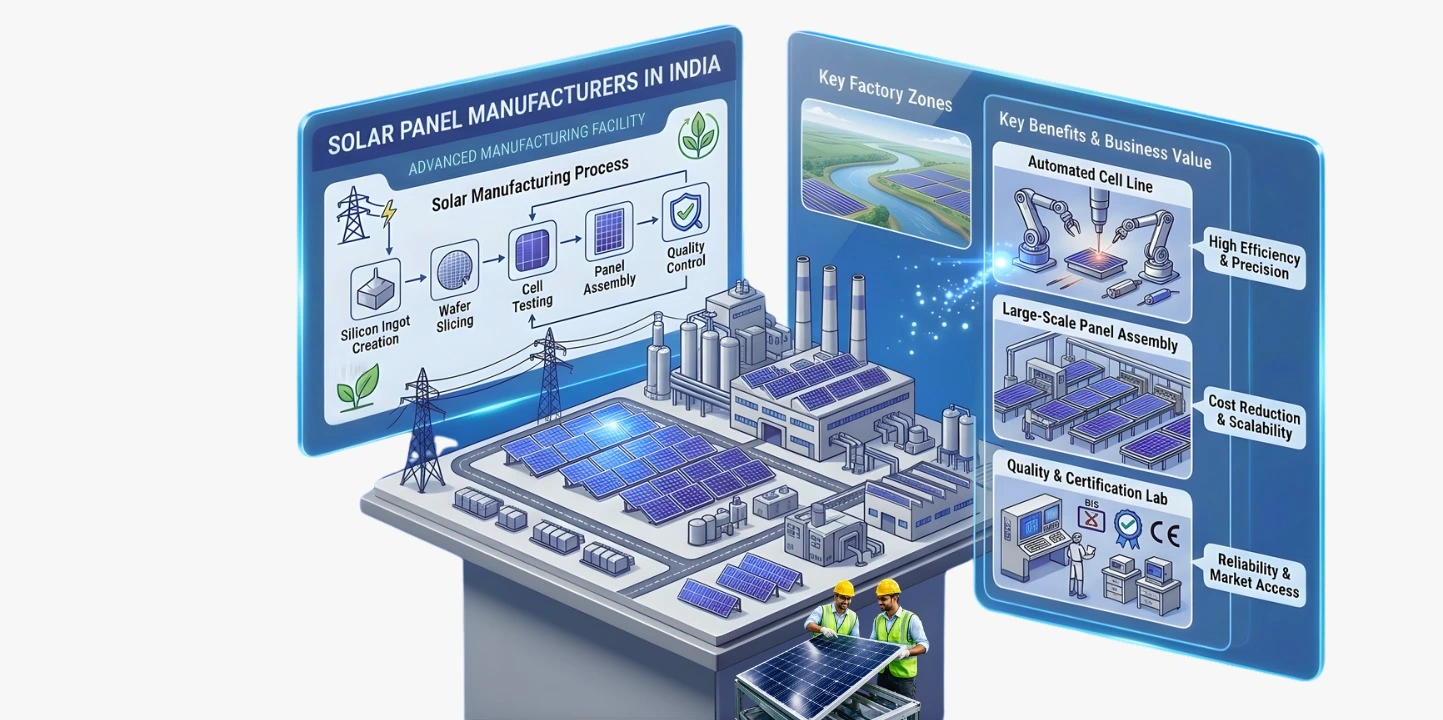
How Solar Panels Are Manufactured (Step-by-Step)
It's easy to look at solar panels and assume they're simple products. In reality, how solar panels are manufactured involves multiple high-precision industrial steps, advanced chemistry, and strict quality control.
Today, most solar panel production happens in large-scale automated factories. Robotics, precision engineering, and mass production have improved quality while reducing costs.
Understanding manufacturing is important, but choosing the right system is more important. We offer the best solar consultant service that helps you select the best panels based on real performance, not just marketing claims.
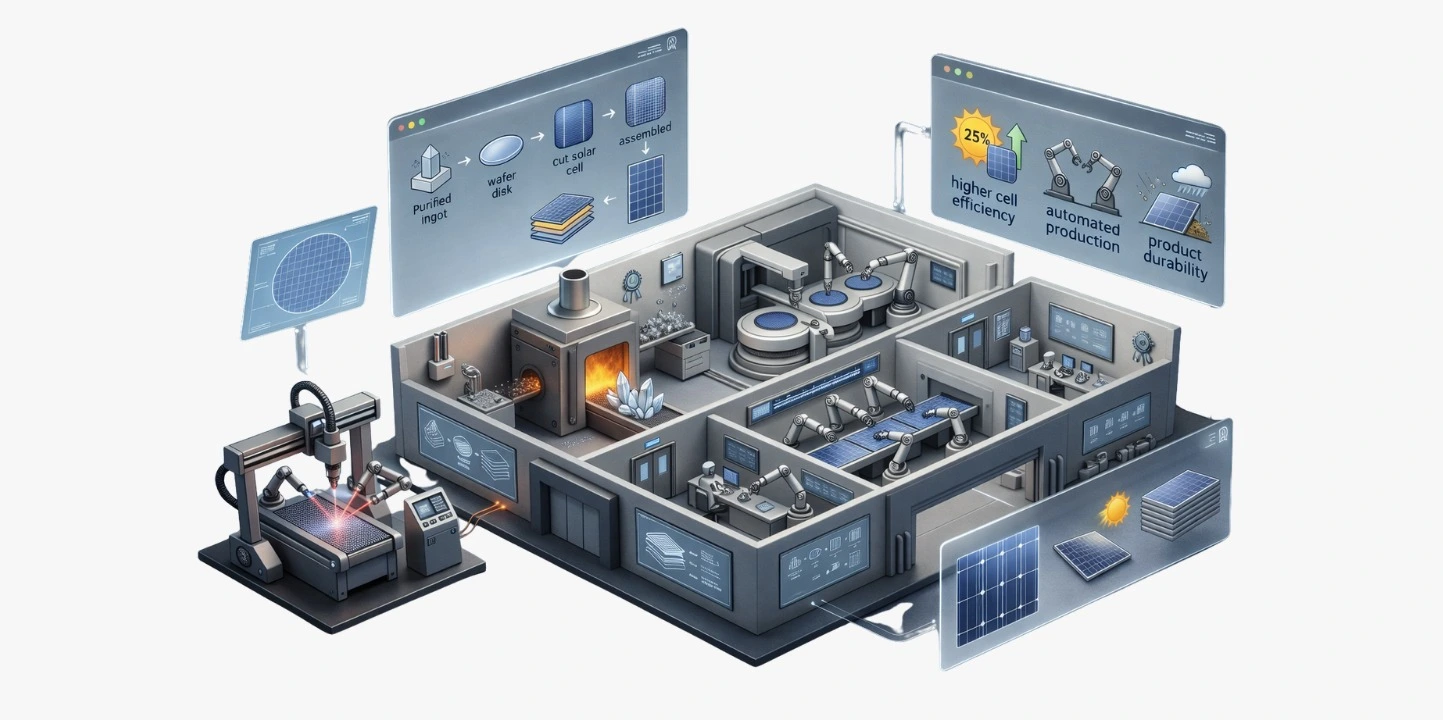
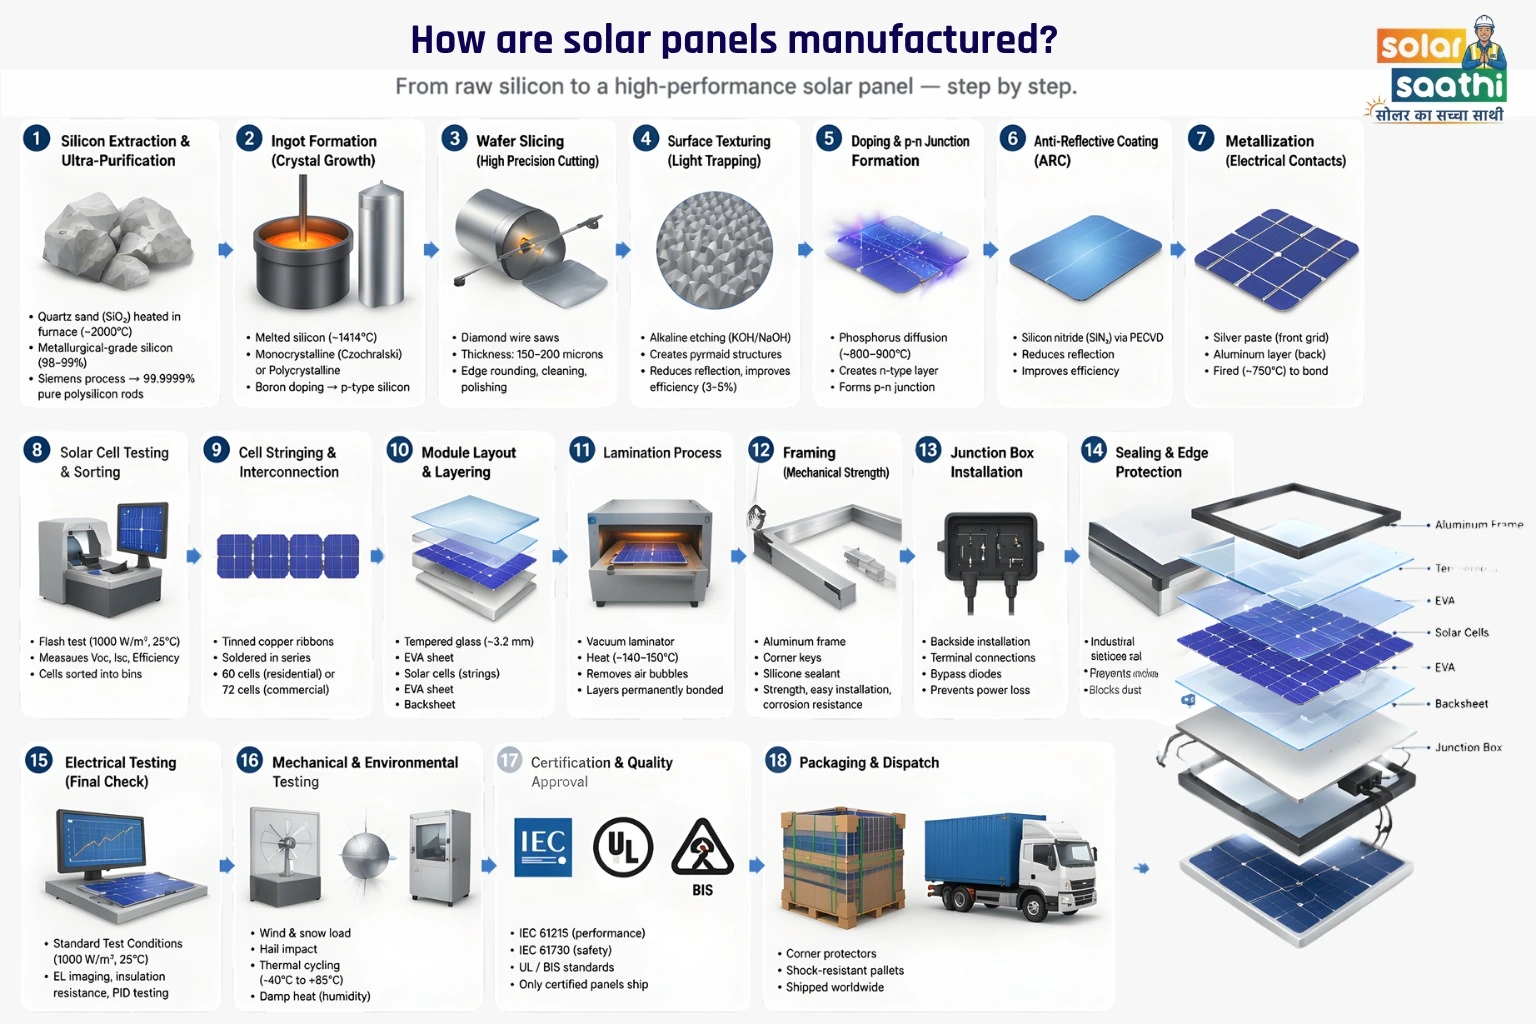
Here is the complete step-by-step process of how solar panels are manufactured:
Step 1: Silicon Extraction & Ultra-Purification
Raw material starts as quartz sand (SiO₂):
- Heated in an electric arc furnace (~2000°C) → produces metallurgical-grade silicon (98–99%)
- Further purified using the Siemens process:
- Silicon reacts with hydrochloric acid → forms trichlorosilane gas
- Gas is distilled → impurities removed at ppm level
- Decomposed at ~1100°C → deposits 99.9999% pure polysilicon rods
This purity level is critical — tiny impurities can reduce efficiency drastically.
Step 2: Ingot Formation (Crystal Growth)
Pure silicon is melted at a high temperature (~1414°C). Two main methods are used:
Monocrystalline (Czochralski Process):
- Seed crystal dipped into molten silicon
- Slowly pulled and rotated → forms a single crystal ingot
Polycrystalline:
- Molten silicon poured into molds and cooled
- Multiple crystals form together
Boron doping is added to create p-type silicon. Crystal structure directly impacts efficiency and cost.
The type of silicon used directly affects panel cost and efficiency. See how this impacts pricing in the detailed solar panel price in India guidance.
Step 3: Wafer Slicing (High Precision Cutting)
Silicon ingots are sliced into thin wafers:
- Silicon ingots are sliced using diamond wire saws
- Thickness: ~150–200 microns (thinner than paper)
- Post-processing includes edge rounding, chemical cleaning (acid baths), and surface polishing
Even a micro-crack here can damage the final cell.
Step 4: Surface Texturing (Light Trapping)
Wafers go through chemical etching:
- Wafers are etched using alkaline solutions (KOH/NaOH)
- Creates pyramid-like microstructures
Benefits:
- Reduces reflection
- Increases light absorption
- Improves efficiency by ~3–5%
Step 5: Doping & p-n Junction Formation
This is a critical step in the solar cell manufacturing process:
- Phosphorus diffusion in furnace (~800–900°C)
- Creates n-type layer over p-type wafer
- Forms the p-n junction — the core of electricity generation
Step 6: Anti-Reflective Coating (ARC)
A thin coating is applied on the wafer:
- Usually silicon nitride (SiNx)
- Applied using PECVD technology
Functions:
- Reduces reflection losses
- Gives cells their blue/black color
- Improves efficiency significantly
Step 7: Metallization (Electrical Contacts)
Metal contacts are added to collect electricity:
- Silver paste printed on front → forms grid lines (busbars & fingers)
- Aluminium layer applied on back
- Fired in furnace (~750°C)
These metal contacts collect and carry the generated electricity.
Step 8: Solar Cell Testing & Sorting
Each cell is tested using a flash tester under:
- 1000 W/m² irradiance
- 25°C temperature
Measured parameters: Voltage (Voc), Current (Isc), and Efficiency. Matching cells avoids power loss later.
Step 9: Cell Stringing & Interconnection
- Cells connected using tinned copper ribbons
- Soldered in series to form strings
- Typical configurations: 60 cells (residential), 72 cells (commercial)
One weak cell can reduce the entire panel output.
Step 10: Module Layout & Layering
Cells are arranged into a panel structure (top to bottom):
- Tempered glass (~3.2 mm)
- EVA sheet
- Solar cells (connected strings)
- EVA sheet
- Backsheet (polymer-based)
EVA acts as encapsulant — binding and insulation combined.
Step 11: Lamination Process
- Stack placed in vacuum laminator
- Heated (~140–150°C) under vacuum
Results:
- Air bubbles removed
- Layers permanently bonded
- Ensures durability for 25+ years
Step 12: Framing (Mechanical Strength)
Aluminum frame attached using corner keys and silicone sealant. Benefits:
- Structural strength
- Easy installation
- Corrosion resistance
Step 13: Junction Box Installation
Installed on the back side of the panel. Contains:
- Terminal connections
- Bypass diodes (prevents power loss due to shading / hotspot protection)
Step 14: Sealing & Edge Protection
Edges are sealed using industrial silicone. Protects against moisture, dust, and environmental damage.
Step 15: Electrical Testing (Final Check)
Panels tested under Standard Test Conditions (STC):
- 1000 W/m² sunlight
- 25°C temperature
Advanced tests include Electroluminescence (EL) imaging, insulation resistance, and PID testing.
Step 16: Mechanical & Environmental Testing
- Wind and snow load testing
- Hail impact resistance
- Thermal cycling (-40°C to +85°C)
- Damp heat (high humidity exposure)
Ensures real-world durability.
Step 17: Certification & Quality Approval
Panels must meet:
- IEC 61215 (performance)
- IEC 61730 (safety)
- UL / BIS standards
Only certified panels are approved for market use.
Step 18: Packaging & Dispatch
Final panels are packed safely with corner protectors and shock-resistant pallets. Shipped globally for residential and commercial installations.
Even the best panels fail without proper installation planning. A professional solar site survey ensures correct placement, angle, and maximum efficiency.
Types of Solar Panels Based on Manufacturing
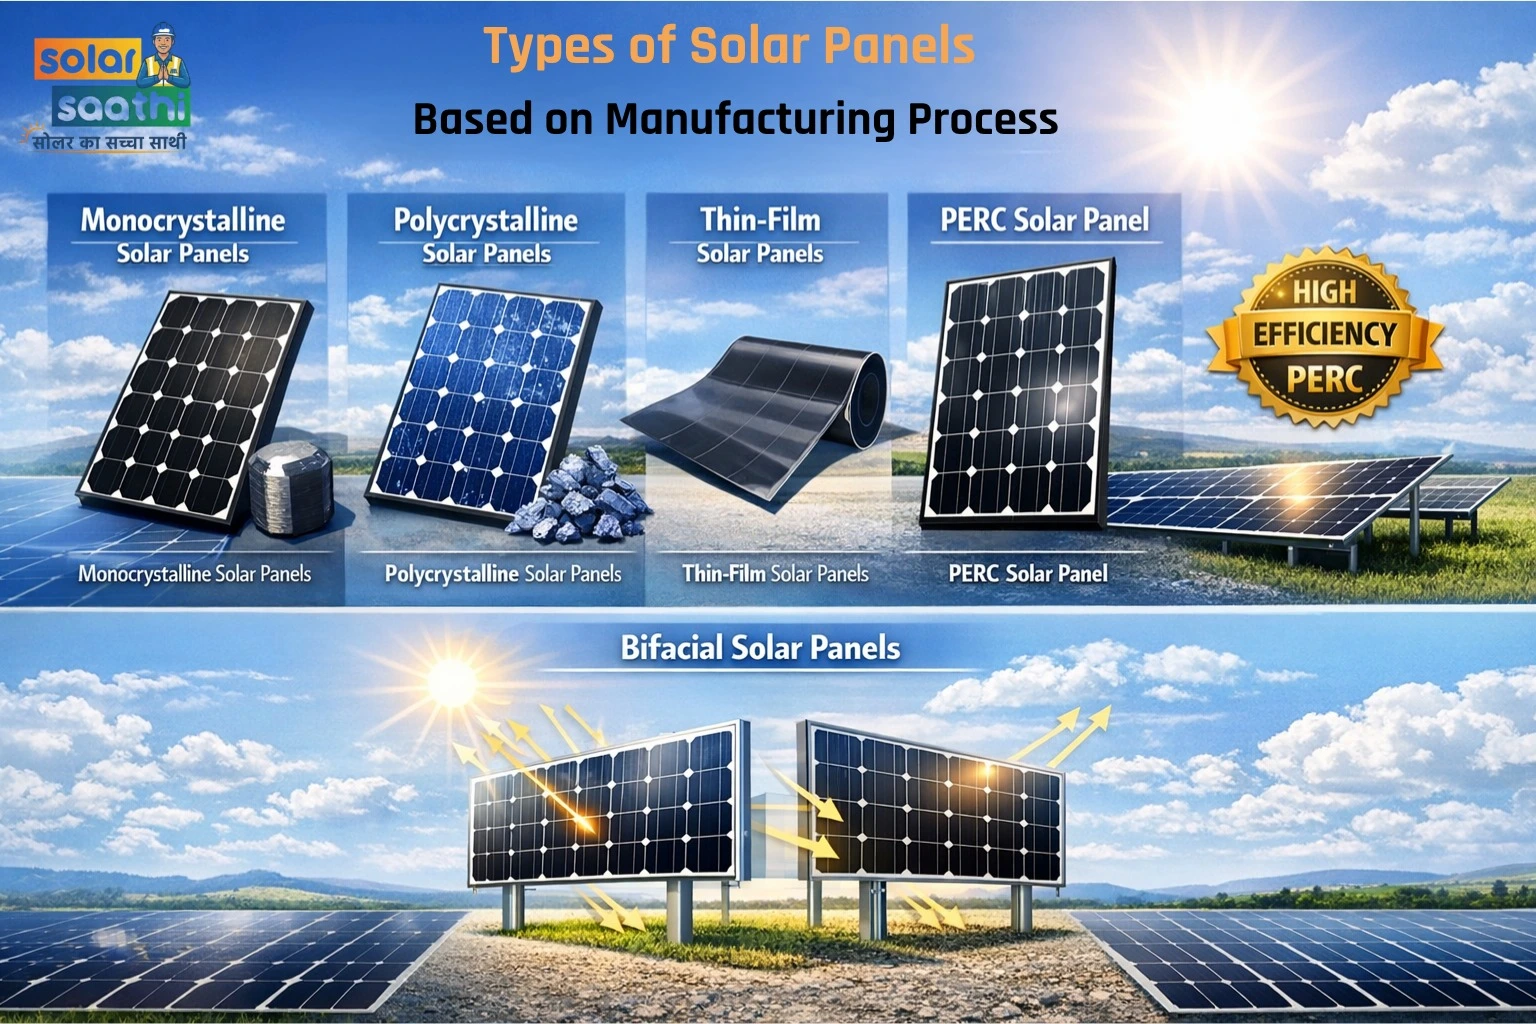
Solar panels are mainly classified based on how they are made. The manufacturing process decides efficiency, cost, and lifespan. There are five main types:
- Monocrystalline solar panels
- Polycrystalline solar panels
- Thin-film solar panels
- PERC solar panels (advanced version of monocrystalline)
- Bifacial solar panels
Each type works differently. Let's understand them in simple terms.
Monocrystalline Solar Panels (Single Crystal Panels)
Monocrystalline panels use a single pure silicon crystal. Manufacturers follow the Czochralski process to make them. A single crystal is grown slowly, then cut into thin wafers. These wafers become solar cells.
- Efficiency: 18% to 22%
- Lifespan: 25 to 30 years
- Color: Dark black
- Shape: Rounded edges
Works best in small space. Produces more power in less area. Performs better in low sunlight. If your roof space is limited, this is the best option.
Polycrystalline Solar Panels (Multi-Crystal Panels)
Polycrystalline panels are made by melting raw silicon. This melted silicon is poured into square molds. Unlike mono panels, multiple crystals form together.
- Efficiency: 15% to 17%
- Lifespan: 20 to 25 years
- Color: Light blue
- Surface: Speckled look
Lower cost than monocrystalline. Good for large roof areas. If you want a cost-effective system, choose this type.
Thin-Film Solar Panels (Flexible Panels)
Thin-film panels do not use thick silicon wafers. Instead, manufacturers deposit thin layers of material on surfaces. Materials used include amorphous silicon, cadmium telluride (CdTe), and CIGS (Copper Indium Gallium Selenide).
- Efficiency: 10% to 12%
- Lifespan: 10 to 20 years
- Structure: Lightweight and flexible
Works on curved surfaces. Easy to install. Ideal for vehicles, sheds, and portable setups.
PERC Solar Panels (Advanced Monocrystalline)
PERC is an upgraded version of monocrystalline panels. Manufacturers add a special layer at the back of the cell to improve light capture.
- Efficiency increase: 1% to 2% higher than standard mono
- Better performance in low light
- Less energy loss
Bifacial Solar Panels
Bifacial panels can absorb sunlight from both sides — direct sunlight from the front and reflected light from the ground.
- Higher energy generation
- Better performance in open areas
- Works well with reflective surfaces
- Best for commercial and ground-mounted systems
Key Manufacturing Differences
| Feature | Monocrystalline | Polycrystalline | Thin-Film |
|---|---|---|---|
| Silicon Source | Single crystal (high purity) | Melted silicon fragments | Amorphous or other materials |
| Manufacturing Process | Complex (Czochralski method) | Simple molding | Deposition method |
| Efficiency | 18% – 22% | 15% – 17% | 10% – 12% |
| Appearance | Black, rounded edges | Blue, speckled | Flexible / black |
| Lifespan | 25–30 years | 20–25 years | 10–20 years |
| Cost | Higher | Lower | Lowest |
Each type follows a different PV panel manufacturing process. Choose based on your budget and requirement.
Why Manufacturing Quality Matters in Solar Panels
Many buyers only look at price. This is a big mistake.
Poor manufacturing leads to:
- Low efficiency from day one
- Faster degradation year over year
- Short lifespan and early failures
Good solar module manufacturing process ensures:
- High power output consistently
- Better durability in all weather conditions
- Long-term savings over 25+ years
Always choose quality over cheap price. A panel that costs 10% more but lasts 5 extra years delivers far better ROI.
Final Thoughts
Now you clearly understand how solar panels are made step by step. From raw sand to finished panels, every stage matters. The photovoltaic cell manufacturing process involves precision and care at each level. Better manufacturing means better performance and savings.
If you plan to install solar, focus on quality panels from trusted manufacturers. It will save money for the next 25 years.
Planning to install solar panels for your home or business? Get expert guidance before you invest. Choose the right system based on your needs and budget.